|
|
 |
 |
Although I tell people that this one came about from eating too much pizza late in the evening, in fact it’s more complex than that. It really all started when I went to the ’Dangerous Curves’ exhibition at the Boston Museum of Fine Arts back in late 2000 or early 2001. As I looked at the harp guitars I was struck by a contrary mood, and realized that they were actually ‘zither-guitars,’ since the drone strings were all parallel to the soundboard surface, rather than pulling upwards as harp strings do. By the time I left the building I had started to think about ways to make ‘real’ harp guitars.
Later, my friend Ken Bonfield expressed an interest in a harp guitar, and I resurrected the doodles of a few years previous. Since my explanations to him didn’t seem to explain very much, I made up a mock-up, using foam for the harp body, and cardboard to make a connecting arm between that and one of my ‘test mule’ guitars. He was still dubious, and pointed out several deficiencies; most notably that the position of the arm made it impossible to see the side of the neck as he was playing. In the event, at that time Ken decided to forgo the harp guitar, and I filed the ideas away.
I had filled the orders on the books, and had a couple of instruments in stock when the Musical Instrument Maker‘s Forum on line announced a contest late in ‘09; the ‘$100 Challenge‘. The idea was to build the coolest thing you could using only $100 worth of materials and parts. Although it was allowed to put together any needed fixtures, and do some basic stock preparation, such as re-sawing, before hand, construction was supposed to commence on Christmas day and end by the 15th of March. What the heck.
I had bought a plank of quartered padauk some years ago at only $5/bd ft, and it looked like enough. I had some ‘reject’ Sitka tops that the Martin company had given to the Catgut Society in the ‘70s to experiment on. Much of the rest of the wood would come from the scrap box: we older luthiers have the advantage over the young guys in having deeper scrap boxes. I did elect to use Macassar ebony for the fingerboard and bindings: padauk needs to be fairly strongly set off to look good. One major economy was in the tuners: I used the very cheapest slot head tuners I could get for the guitar strings, and autoharp bridge pins ( $.33@) for the harp strings. Fortunately for me, strings were not included in the budget. With the economic aspects pretty well settled, I spent some time making drawings, getting the fixtures going, and re-sawing the padauk.
|
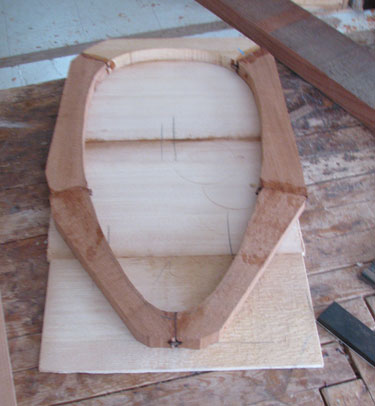 |
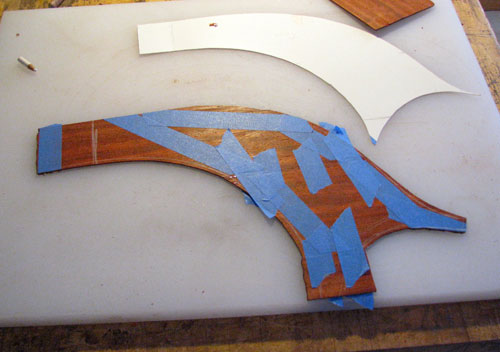
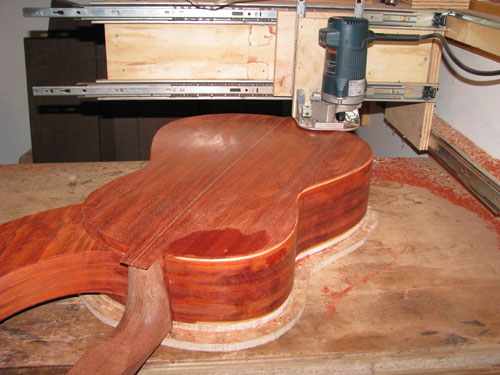
| The first piece to make was the ’rub rail’ for the harp soundboard. Harp strings pull upward on the soundboard, and this puts a peeling stress on the edge if it’s glued on in the usual manner. The rub rail of a harp is actually an outside 3/4 round molding, more or less, that captures the soundboard edge within. In this case, I made a more or less teardrop shape that has an ’L’ cross section, with the top in the base of the ‘L‘, and the upright glued to the sides of the box. The rail was made in five pieces, that were butt glued with epoxy and keyed at the joints with composition board. In this shot you can also see the Sitka soundboard, joined of three pieces with the grain running crosswise. |
 |
| Once the inside edge was smoothed the ledge could be routed, and the outside edge trimmed off and smoothed as well. The soundboard was thicknessed, trimmed to fit, and glued in, with ‘tentellones’ as added insurance. There is a spruce ‘string bar’ on the inside, with a persimmon ‘shoe’ to take the ball ends of the strings. There is also a padauk outer string bar. The end block is a scrap of mahogany, as are the laminated bows at the ends. The ‘butterfly’ braces, that help to keep the sides from pulling inward under string tension, were made of scraps of a cedar guitar top. |
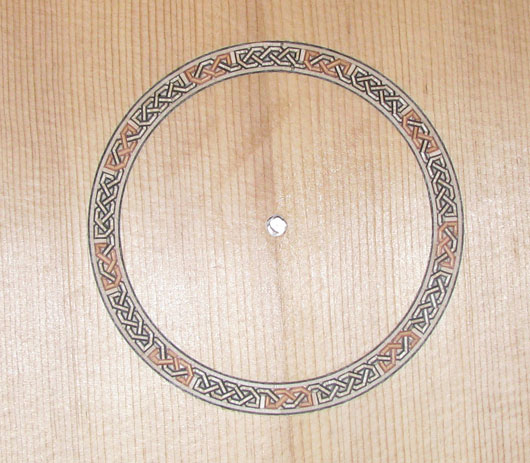 |
| The rosette for the guitar soundboard was mostly made of leftover material from other rosettes. Those are maple, euonymous, bloodwood and black dyed poplar. This is probably the only time I will ever get one of these interlace rosettes to come out even. |
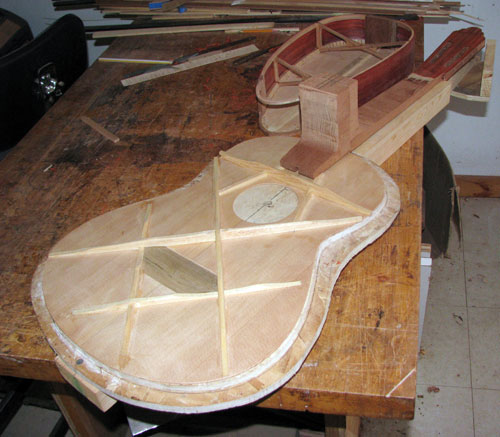 |
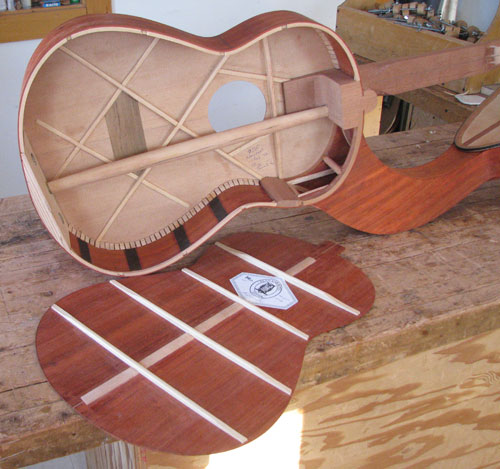
The only way I could think of to keep the harp and guitar soundboards in the proper alignment during building was to make the instrument on a ’solera’. The neck and neck block are integral, with the sides slotted in. This is normally not a good way to build a steel string instrument as it does not allow for re-setting the neck, but in this case, where the neck was to be attached at both ends (to the guitar and the harp) the risk was considered minimal. The neck does have a normal truss rod, to allow for relief adjustment.
Note the normal looking bracing here. Most harp guitars have the harp strings pulling on the guitar soundboard, which puts a lot of stress on it, and requires some ‘beefing up.’ The hope on this guitar was that attaching the strings to the harp and the lower end of the body would keep the stress on the guitar soundboard more ‘normal’, and allow it to be made lighter for more sound and stronger bass. |
 |
| Once the soundboard and neck were glued together they were clamped to the solera. The wide plywood lower block was glued on, and the sides bent and attached to the top with tentellones in the usual manner. |
 |
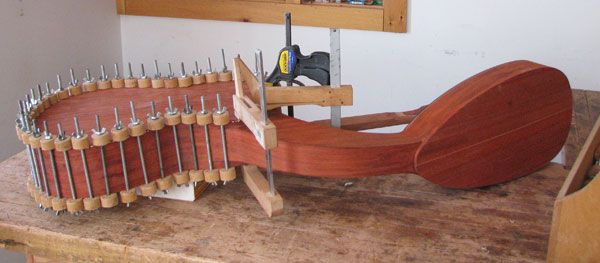
| The big spruce stick between the neck and tailblock is to take up the tension of the harp strings. The dark lines on the sides are cotton-polyester tapes to help prevent side cracks, which seem to be needed on this padauk! With all of that done, the sold willow back liners were bent and installed, along with the laminated bows for the upper bout on the right side. |
 |
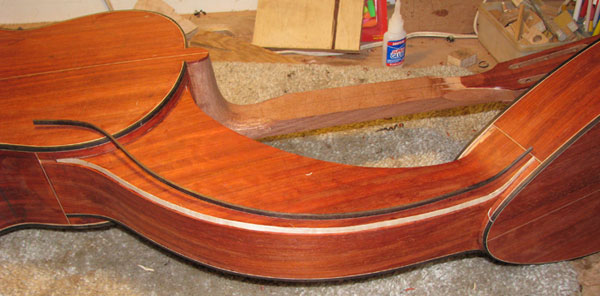
| Now the harp box was bolted to a fitting on the upper end of the solera to hold it in position, and the sides of the connecting arm were bent to shape and glued on. The bolt head you can see on the inside of the upper block of the harp box connects with an extension arm that is dovetailed into the headstock of the guitar. The bolt was used because this joint is in tension when the harp strings are on. |
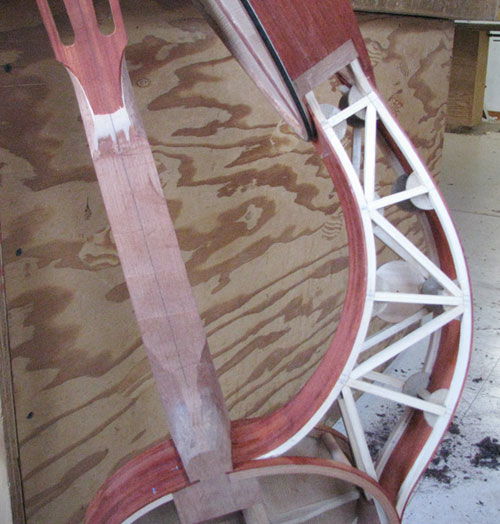 |
| This being the first harp guitar I’ve built, and an odd one to boot, I followed the ‘belt and suspenders’ rule; overbuilding whenever possible so long as it did not add too much weight. In this case, the liners along the corners of the arm were joined using a spruce truss structure with composition gussets at the corners. |
 |
| Once this was in the remaining skins could be joined, bent, and glued on to close in the arm. |
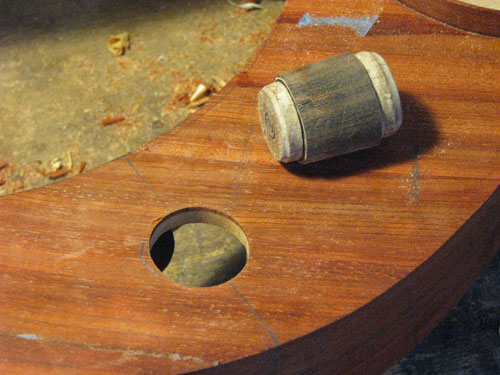 |
| The upper skin has a ‘port’ in it, and this got a surround. The ebony block is drilled along the grain, turned to a taper concentric with the drilled hole, and a maple veneer outer layer is laminated on. Once the hole is drilled in the surface the taper can be wrapped with sandpaper, and used to shape the surface of the hole for an exact fit. The taper is then glued in, and trimmed off flush. Then the back skin was glued on. |
 |
 |
The harp back was glued up, fitted, and braced and then glued to the box.(hbon). |
 |
 |
| The same was done to the guitar back. Note the T-nut fittings on the inside of the tailblock for the lower tuner block to bolt to. |
| |
 |
| With the boxes closed it was time to do the balance of the binding. The upper surface of the harp, around the rub rail, had to be done before it was attached to the fixture, since there would be no easy way to get at it after that. Here I’m using my usual binding rout fixture to make the rabbets on the guitar body. |
 |
The arm posed a bit of a problem. The corners had to be scribed with a gauge, and cut by hand with a chisel and knife. Due to their shapes the bindings for these edges had to be bent in two directions. There is a layer of maple veneer glued to one surface of the rabbet as purfling, with the other purfling line as part of the binding itself.
The process of finishing was not pretty, and you don’t need to see it. Padauk has pores like soda straws, and required a lot of filling and sanding to get to some semblance of smoothness. This was followed by about six coats of ‘Rockhard’ varnish. As often happens, the first coat took some time to harden on the ebony bindings, but after that it went well. The only other issue was that this thing has a structure like a chair, with lots of surfaces and corners that have to be smoothed out. |
 |
| Once the finish was on the guitar bridge was made and glued up, the lower pin block for the harp tuners was fitted and bolted on, and the final setup done. A miscalculation put the innermost string of the harp too close to the guitar neck, and I ended up going with five instead of six sub-basses. |
 |
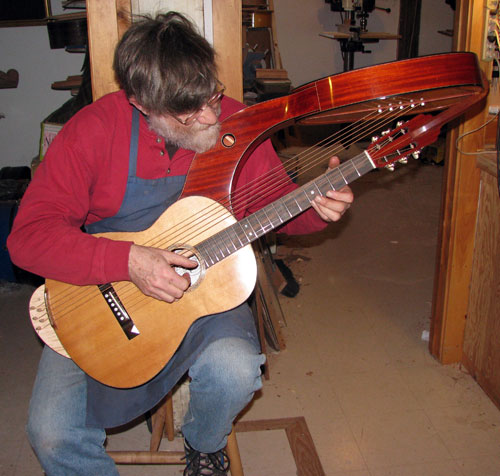 |
Here’s the ‘aircraft carrier shot’ of the completed instrumen and here I am playing it.
Part of the impetus for this design was the hope that the ‘harp’ might be more effective than the usual ’zither’ in producing sound from the sub-basses. In any case the wavelength of the lowest note is so much longer than the length of the instrument itself that it must necessarily radiate it’s lowest sounds as a ’point source’ with rather low efficiency. However, it was hoped that a light harp soundboard using fairly heavy strings would be effective, even when it was not efficient. This hope was only marginally realized, in my opinion.
For one thing, using regular steel core guitar strings gave a fairly unpleasant sound. Harp players, even those who use wire strings, eschew steel, and now I know why. I believe it’s the high pitch and amplitude of the ’longitudinal’ waves in the steel strings that are the issue, as these will couple well to the harp soundboard, and are normally not harmonically related to the pitches of the strings. In fact, if they are harmonically related to the string pitches, that can be a bad thing. Substitution of nylon floss core harp bases gave a much improved sound, but the harp has a different timbre than the guitar in that case. The obvious fix, switching the guitar to nylon strings, has not been tried, but might not work well here as the top is much more heavily braced than a normal classical guitar.
Various constraints and a few miscalculations left the instrument as completed with a connecting arm of rather restricted cross section. This limits the amount of coupling between the harp and guitar bodies. The small ’port’ in the arm was simply not large enough to be a sufficient soundhole for the harp, and another hole was added later in the upper side of the harp box itself. This made a considerable improvement in the volume and timbre of the instrument.
The autoharp tuners prove unsatisfactory in the long run with the large diameter bass strings. This was anticipated, and was one reason the lower pinblock was made removable. Banjo fifth string tuners proved to be a somewhat better choice, if only because you would not misplace the tuning hammer.
|
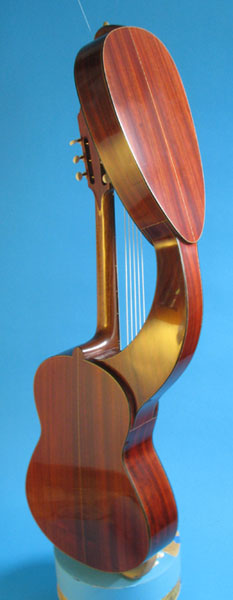 |
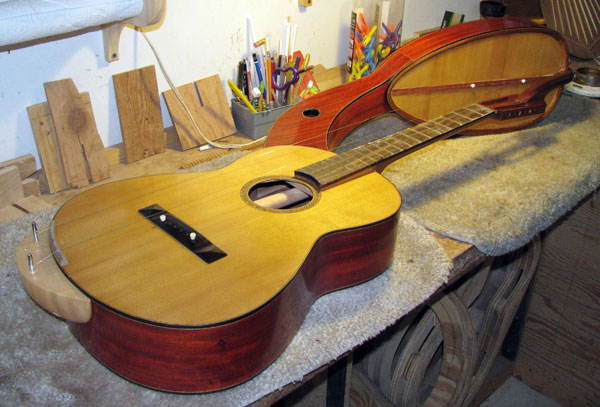
| The two final shots of the front and back of the completed instrument show it in it’s final form, with a few more coats of varnish. Altogether this was a most successful prototype: fairly comfortable to play, solid and stable, and with a pleasant sound. |
|
